A few years back, I was working with a team that had to submit monthly compliance reports to a regulatory body via an online portal. The portal had a 10MB file size limit. Our reports were consistently coming in at 47MB. Three pages. Forty-seven megabytes.
The culprit, it turned out, was a single embedded logo — a PNG file that someone had pasted directly from a design tool without resizing or compressing it. The image itself was 38MB. The rest of the report was barely 2MB.
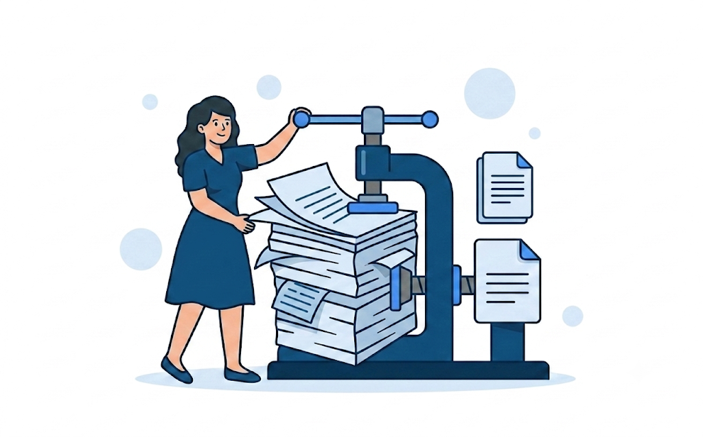
That experience taught me something I have since seen confirmed dozens of times: PDF file size problems almost always have a specific, identifiable cause. They are not random. Once you know what to look for, diagnosing an oversized PDF takes minutes — and fixing it usually takes less.
This guide covers every major cause of bloated PDF file sizes, how to diagnose which one is affecting your file, and what you can realistically do about each one.
Why PDF File Size Matters
Before getting into causes, it is worth being clear about when file size actually matters — because sometimes it does not.
File size matters when:
- You are emailing attachments and hitting inbox limits (Gmail caps attachments at 25MB)
- You are uploading to portals with file size restrictions (government forms, job applications, legal submissions)
- You are hosting PDFs on a website and care about page load speed
- You are storing large volumes of documents and storage costs are a concern
File size does not matter much when:
- You are sharing via Google Drive, Dropbox, or WeTransfer
- The PDF is for internal use and storage is not constrained
- The document is genuinely large and complex and the size reflects the content
With that in mind — if your PDF is larger than you expected, here is exactly why.
The Seven Reasons PDFs Get Bloated
1. High-Resolution Images (The Most Common Culprit)
Images are almost always the primary driver of PDF file size. A single uncompressed or high-resolution photograph can easily exceed the size of an entire text document.
The problem usually starts at the source. Design tools, screenshots, and camera photos all produce images at far higher resolution than a screen or printer actually needs. A photograph at 300 DPI (dots per inch) is appropriate for professional print output. For a PDF that will only ever be viewed on screen, 72–96 DPI is sufficient. The difference in file size between those two settings for the same image can be tenfold.
Common scenarios that produce oversized images in PDFs:
- Pasting screenshots directly into Word or PowerPoint before exporting to PDF
- Inserting photos from a camera or phone without resizing first
- Using PNG files where JPG would be sufficient (PNG is lossless and significantly larger)
- Copying images from design tools at print resolution into documents intended for screen
What to do: If you have access to the source file (Word, PowerPoint, InDesign), reduce image resolution and re-export the PDF. In Word, go to File → Options → Advanced → Image Size and Quality and set "Default resolution" to 96 PPI for screen documents. Then re-export.
If you only have the PDF, using a PDF compression tool is the most practical option. Be aware that compression involves resampling the images — the file gets smaller, but there is a quality trade-off. For documents where image quality matters (photography portfolios, print-ready files), compress conservatively.
2. Uncompressed or Poorly Compressed Images
Related to resolution, but distinct: even images at appropriate resolution can be bloated if they are stored using inefficient compression inside the PDF.
PDF supports several image compression methods. Lossless compression (used for PNG-type images) preserves every pixel but produces larger files. Lossy compression (used for JPG-type images) discards some data to achieve much smaller sizes, with minimal visible difference at moderate quality settings.
Some PDF creation tools default to minimal or no compression. Others use lossless compression for all images regardless of type. If your PDF was produced by older software, a scanner, or a tool with conservative default settings, the images inside it may be significantly larger than they need to be.
What to do: Re-export from the source with compression settings adjusted, or use a compression tool to re-process the images. Most PDF compression tools handle this automatically — they analyse each image and apply appropriate lossy compression, which is where most of the size reduction comes from.
3. Embedded Fonts — The Full Set vs. Subsets
Fonts embedded in PDFs take up space. How much space depends on whether the entire font or just the characters actually used are embedded.
Embedding the full font file includes every character, glyph, and variant in that typeface — even the ones your document never uses. For a standard Latin alphabet document, a full font embed might include thousands of characters from other writing systems you will never need. Font subsetting embeds only the specific characters that appear in the document, which can reduce font-related file size by 80–90%.
Most modern PDF export tools use font subsetting by default, but older tools and some enterprise document systems sometimes embed complete font files.
How to check: Open the PDF in Acrobat Reader, go to File → Properties → Fonts. Fonts listed as "Embedded Subset" are using subsetting. Fonts listed as just "Embedded" are using the full font file.
What to do: Re-export the PDF from the source application with font subsetting enabled. In most tools, this is the default — you may just need to update to a newer version of your export tool, or check the export settings explicitly.
4. Redundant or Hidden Content
PDFs can accumulate invisible content that contributes to file size without adding anything visible:
Hidden layers: Documents created in design tools sometimes contain layers that are toggled off but still embedded in the file. The content exists in the PDF — it just is not displayed. When you export to PDF, those hidden layers often come along for the ride.
Metadata and document properties: Author name, revision history, embedded thumbnails, custom properties, and other metadata can add meaningful size to a file, especially in documents that have gone through many revisions or been produced by enterprise document management systems.
Embedded thumbnails: Some PDF creators embed page thumbnail images inside the file so viewers can display them quickly. For long documents, these thumbnails can add several megabytes.
Deleted content: In PDFs that have been edited or had pages removed, the original content is sometimes retained in the file structure and simply marked as deleted rather than physically removed. Compressing or optimising the PDF cleans this up.
What to do: Use a PDF optimisation tool or re-export cleanly from the source with unnecessary elements stripped out. Acrobat Pro's "PDF Optimiser" gives granular control over exactly what gets removed. For most everyday documents, a general compression tool handles this automatically.
5. Scanner Output
Scanned documents are a special case — and they are often spectacularly large.
When a scanner converts a physical document to PDF, it takes a photograph of each page and packages those photographs into a PDF container. The resulting file is essentially a collection of high-resolution images. A 10-page scanned document at 300 DPI can easily be 20–50MB. The same document as a text-based PDF would be under 500KB.
Scanners also frequently default to higher DPI settings than necessary. 300 DPI is appropriate for OCR (making the text searchable). For pure archiving of text documents, 150–200 DPI is usually sufficient. Many office scanners default to 600 DPI or higher, producing files that are far larger than their purpose requires.
What to do:
- Adjust your scanner's DPI settings. For text documents you just need to read or archive, 150–200 DPI is enough. For OCR, 300 DPI is the practical minimum.
- Use grayscale or black-and-white mode for text-only documents rather than colour scanning — this alone can reduce file size by 60–70%.
- If you need the scanned PDF in a smaller, editable format, converting it to Word via PDF Doctor's PDF to Word tool can dramatically reduce the file size, though note that scanned PDFs convert as images rather than editable text unless OCR is applied.
6. Multiple Versions of the Same Data (Incremental Saves)
When you edit a PDF in Acrobat or certain other tools, it uses a system called incremental saving — rather than rewriting the entire file, it appends the changes to the end. This is fast and preserves the ability to undo changes, but it means the file accumulates the history of every edit.
A PDF that has been through 20 rounds of review and revision in Acrobat might contain 20 versions of the same content stacked on top of each other. The visible result is just the latest version, but all the previous versions are still in the file.
What to do: "Flatten" or "save as optimised" to consolidate the file down to a single version. In Acrobat, File → Save As → Optimised PDF removes incremental save history. For a quick fix, simply printing the PDF to a new PDF file (using your operating system's print-to-PDF function) creates a fresh, clean copy without the revision history.
7. Embedded Files and Attachments
PDFs can contain embedded files — other documents, spreadsheets, images, even other PDFs attached directly inside the file. This is occasionally useful (some legal and accounting workflows use it) but is more often accidental, and the embedded files can be enormous relative to the host document.
If you have received a PDF that is unexpectedly large and none of the other causes seem to apply, check for embedded attachments. In Acrobat, go to View → Navigation Panels → Attachments to see if anything is hiding inside the file.
Diagnosing Your Specific File
Rather than guessing, here is a systematic approach:
Step 1: Check if images are the cause. Open the PDF and look at it. Is it image-heavy? Are there photographs, screenshots, or graphics? If yes, images are almost certainly the primary driver.
Step 2: Count the pages vs. the size. A rough guideline: a text-only PDF should be roughly 50–100KB per page. If you have a 5-page text document at 30MB, something unusual is going on — likely embedded images or attachments.
Step 3: Try printing to PDF. On any operating system, you can "print" a PDF to a new PDF file using the built-in print-to-PDF function. This creates a clean, flattened copy. If the new file is dramatically smaller, the original had redundant revision history, hidden layers, or accumulated metadata.
Step 4: Look for attachments. If the above steps do not explain the size, check for embedded files as described above.
What Actually Works and What Does Not
There is a lot of advice online about reducing PDF file size that ranges from useful to completely counterproductive. Here is an honest summary:
Works well:
- Resampling high-resolution images to screen resolution (biggest impact, usually 60–90% size reduction)
- Applying lossy compression to images already at appropriate resolution (moderate impact)
- Removing revision history through optimisation (varies, significant for heavily edited files)
- Re-scanning at lower DPI in grayscale (dramatic impact for scanned documents)
Works but with trade-offs:
- Aggressive lossy compression (smaller file, but visible image degradation)
- Converting scanned PDFs to text-based PDFs (much smaller, but requires OCR quality)
Does not work or barely works:
- Compressing a PDF that is already a compressed text-only document (almost no impact)
- Zipping a PDF (PDFs are already compressed internally — ZIP adds almost no benefit)
- Re-saving without optimisation (does nothing to actual file content)
Practical Size Targets by Document Type
As a reference point for whether your file size is reasonable:
Document type
Expected size
Concern threshold
1-page text document
50–150 KB
Over 2 MB
10-page text report
300–800 KB
Over 10 MB
Presentation (20 slides, some images)
2–8 MB
Over 30 MB
Scanned document (10 pages)
3–8 MB
Over 30 MB
Photo-heavy brochure (8 pages)
5–20 MB
Over 80 MB
These are rough guides, not hard rules. A document at the "concern threshold" is not necessarily broken — it may just have high-resolution images that are appropriate for print. But if a simple text document is hitting those numbers, something is wrong.
Working With PDF Doctor for Large Files
PDF Doctor's tools work with PDF files up to 25MB per file. If you are working with a file larger than that, reducing the size before uploading is the practical first step.
For files that need conversion — turning a large PDF into an editable Word document, for example — the PDF to Word converter handles text-based PDFs reliably. For scanned documents, conversion quality depends on the scan quality; a clean, high-contrast scan at 300 DPI will convert significantly better than a blurry photograph of a document.
If you are splitting a large PDF into smaller sections before processing, the Split PDF tool is the most straightforward approach — break it into sections, process each one, then merge the results using the Merge PDF tool.
Summary
PDF file size is almost always explainable. Images — at too high a resolution, in the wrong format, or with insufficient compression — are the cause in the majority of cases. Scanner output and revision history are the next most common culprits.
The fastest diagnostic: compare the page count to the file size. If the ratio is dramatically off from the rough benchmarks above, start with images. If the file is a scanned document, reduce the DPI at the scanner. If the file has been through heavy editing, flatten it to remove revision history.
Most PDF size problems are fixable. And the fix usually takes less time than the frustration of hitting an upload limit or watching a file refuse to send.
Need to split a large PDF into smaller, more manageable sections? Use PDF Doctor's free Split PDF tool — no account needed, works directly in your browser.
Working with a scanned PDF that needs to be editable? Try converting it to Word for the most straightforward editing experience.